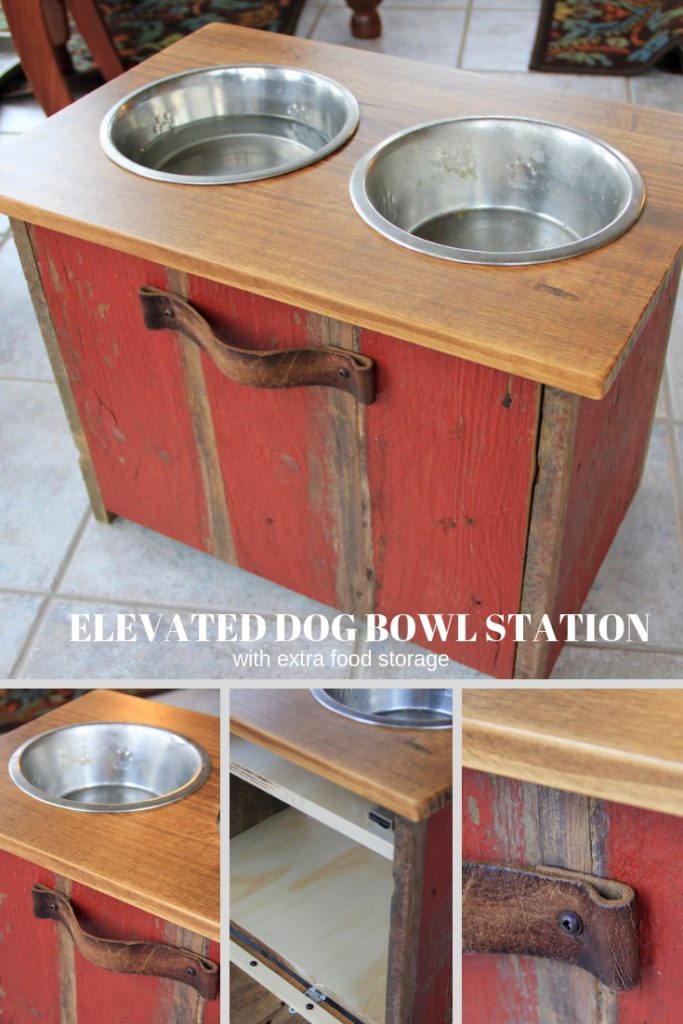
For several years we have simply had separate food and water bowls for our 100 pound golden doodle sitting on the kitchen floor. A while back my wife thought it would be wise to elevate her food and water bowls since she is quite tall. We’ve used everything from a popcorn tin to a 5 gallon bucket as we experimented with different heights that would work well for our dog.
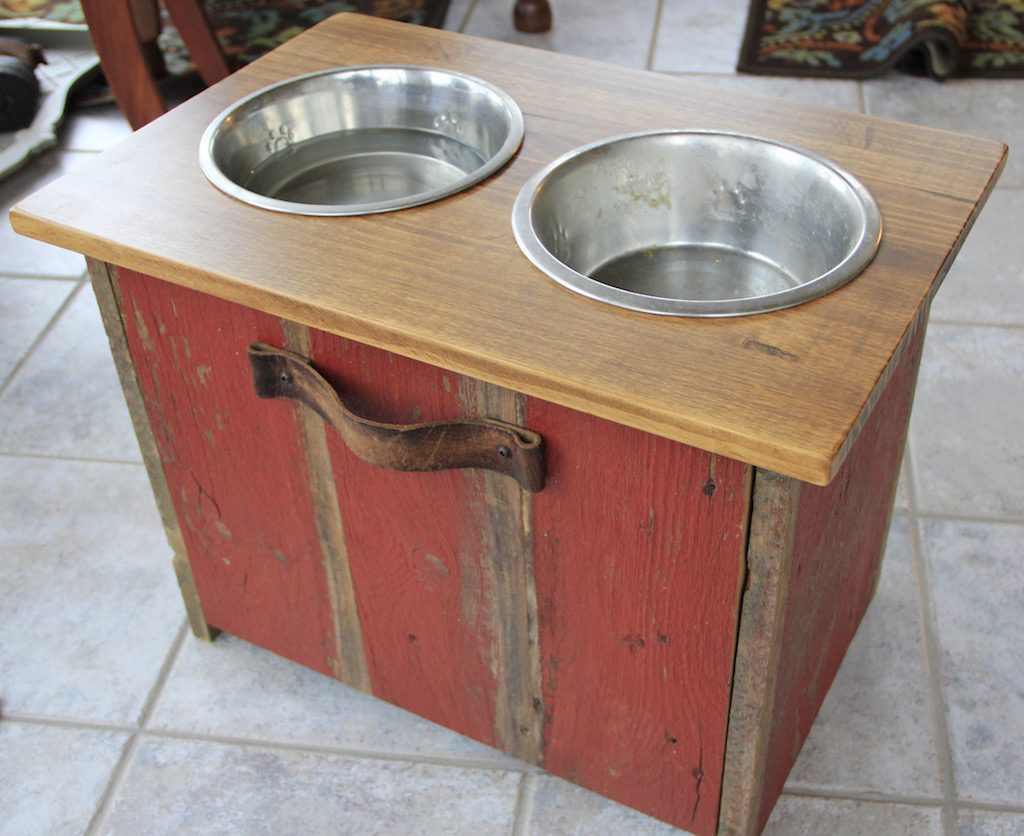
These things worked, but they certainly weren’t attractive as a dog food stand. So, finally, after months of talking about it, I built an elevated dog bowl station with extra food storage underneath.
What else to consider in your elevated dog bowl station?
My overall design is simple.
- A top with 2 holes for the food and water bowls.
- A partition just below the bowls to catch any spills.
- A storage compartment for extra food.
- And a front that tilts out for easy access.
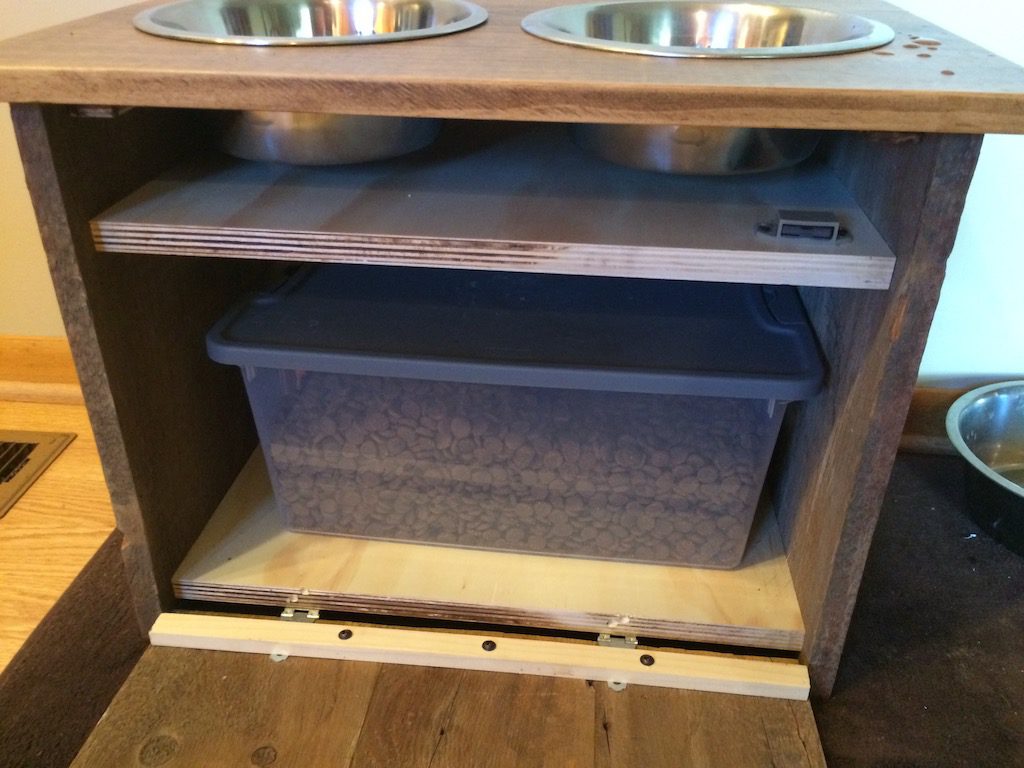
I have seen many designs that require you to lift the bowls out or the top off in order to access the food storage, which is something I wanted to avoid. This design allows you to access the extra food without moving or removing the dog’s food and water bowls.
The front tilts out and rests on the floor so that when you pull the storage container out, it can rest on the front without tipping the whole station. I thought about building a drawer instead, but I was concerned that 15 quarts of food would tip the whole station.
What size should you build your elevated dog bowl station?
This project starts by determining the size of your dog food storage bin as well as the size of your food and water bowls.
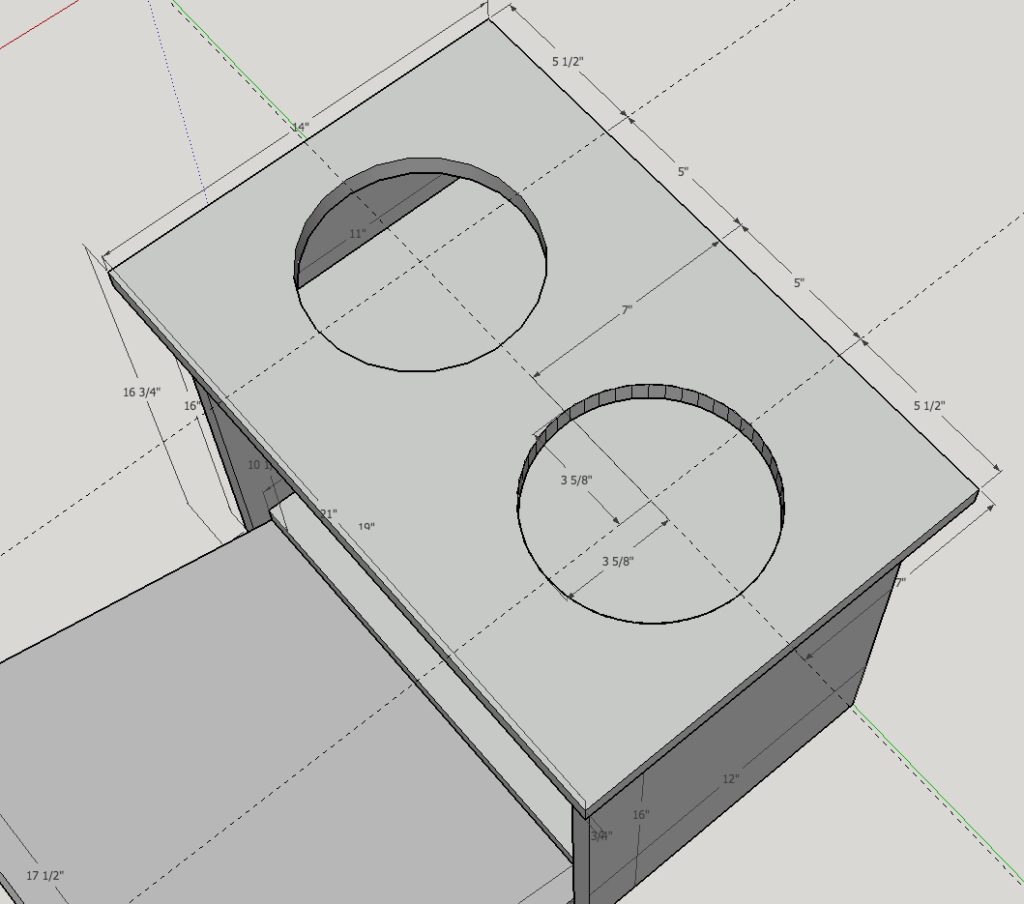
You want a bowl with a lip that you can drop into the top of the stand. We purchased the bowls we used at Walmart for a few bucks each. These bowls require about a 7.5 inch diameter hole.
The dog food storage container came from Walmart as well. It’s nothing special. Just a plastic storage bin with a lid and locking handles. We chose a 15 quart container as it will store quite a bit of food. In fact, it will store enough that we can take the dog food bin with us when we travel and have enough for an extended stay if need be.
Once you have the dimensions of your food storage container and your bowls, you can design your own elevated dog food station.
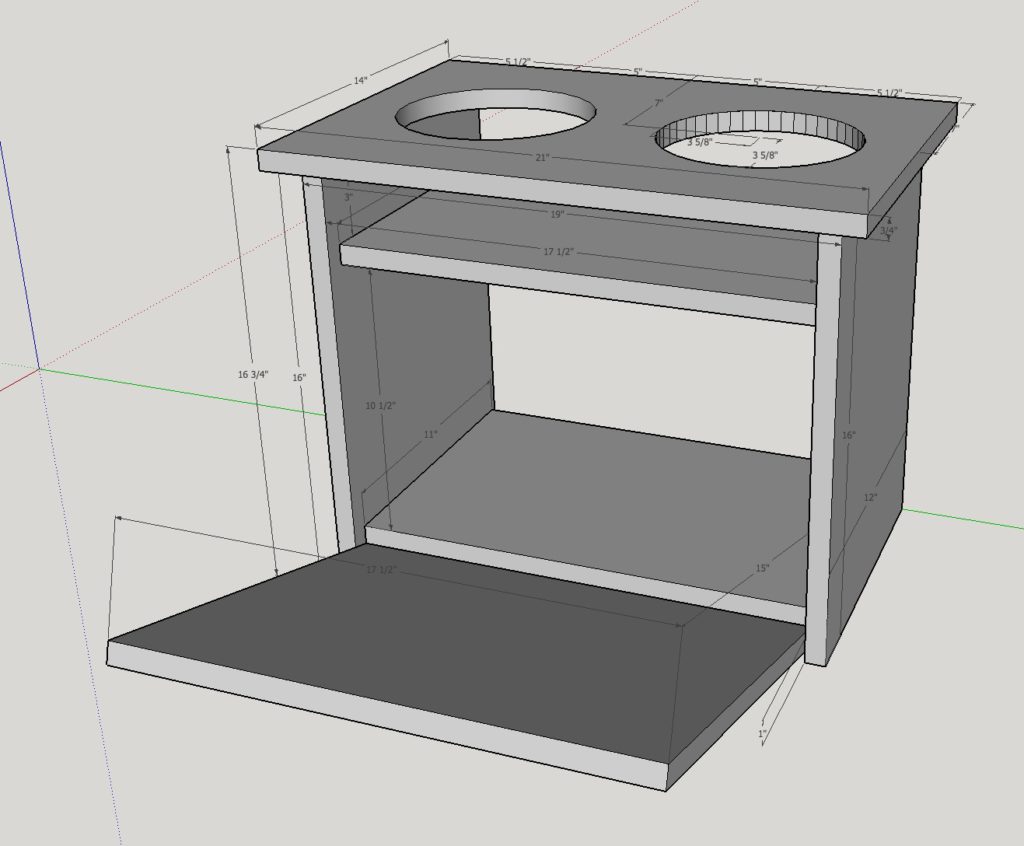
Here are the dimensions I used for the food and water station I build for our large dog. Feel free to adjust them as needed.
What about height for your elevated dog bowl station?
My version is quite tall because my dog is quite tall.
I don’t know that there is a specific formula to use. You can experiment by placing your dog’s dish on something temporarily to see what seems comfortable for the dog. The idea is to raise the dog’s food so that they don’t have to bend their front legs to eat or drink.
With the extra height in mine, I allowed about 3 extra inches in the storage area in case we ever get a different storage bin.
Materials for your elevated dog bowl station.
I used reclaimed barn wood for the sides and front, and an edge-glued pine panel from Menards for the top. The internal pieces are scraps of pre-finished plywood that I had leftover from another project.
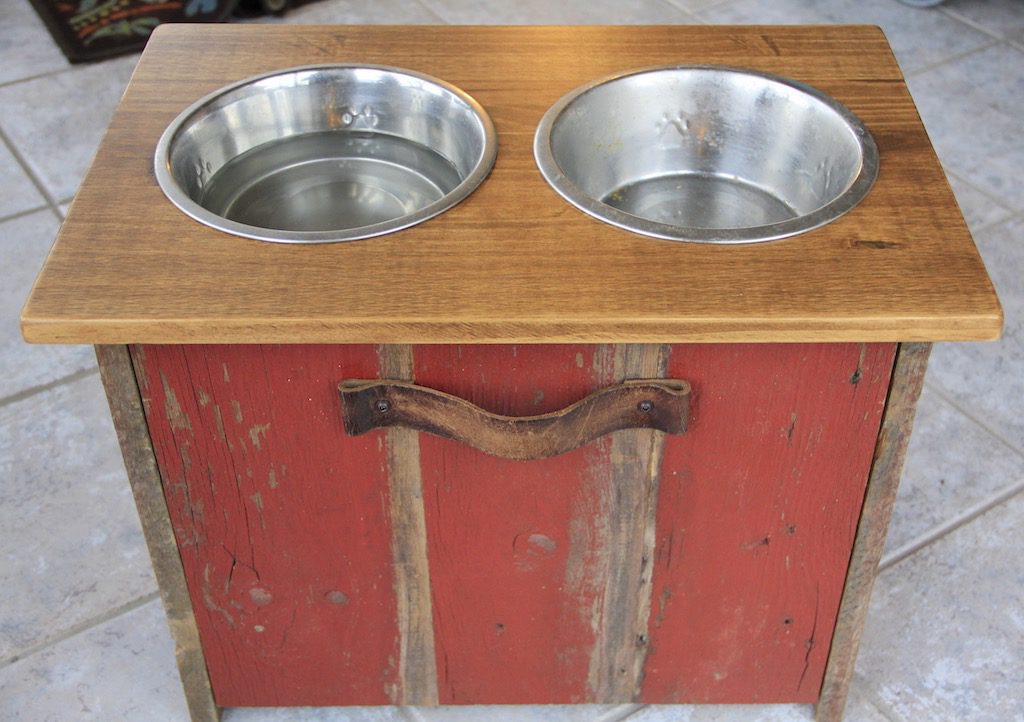
Since it will undoubtedly get wet and dirty, you may want to use reclaimed or recycled materials rather than high quality hard-woods. Old pallets, scrap decking material, or cheap pine boards from the home store will do.
Just be sure to either paint or seal the wood with a quality paint, polyurethane, or other waterproof wood finish. I sprayed my barn wood with Minwax aerosol satin polyurethane. The top is stained with a gel stain and also sprayed with Minwax satin poly.
I did not put a back on the dog food station as ours will always sit against the wall. I did allow 1/4 inch of space on the back side in case I every change my mind. Attaching a back will help stabilize any lateral movement. So if your stand isn’t quite square, you can attach a back to help keep if from shifting.
Assembling your elevated dog bowl station.
I used pocket screws to attach the internal pieces to the barn wood side pieces. My barn wood happened to be 12” wide which was perfect for accommodating the depth of the storage container. If it had not been, I would have glued a couple boards together in order to make the side panels.
The front required gluing three pieces together. I first squared up the edges on the table saw, and then used glue and biscuits to edge-glue the boards together. I also added 2 cross pieces on the back for extra strength since the old barn wood I used is fairly soft and brittle. Just be careful where you place the cross pieces so they don’t interfere with the ability to close the front.
I used a couple of small strap hinges on the bottom of the door and a piece of leather from an old belt for the handle to keep with the rustic theme. The leather handle was a great addition!
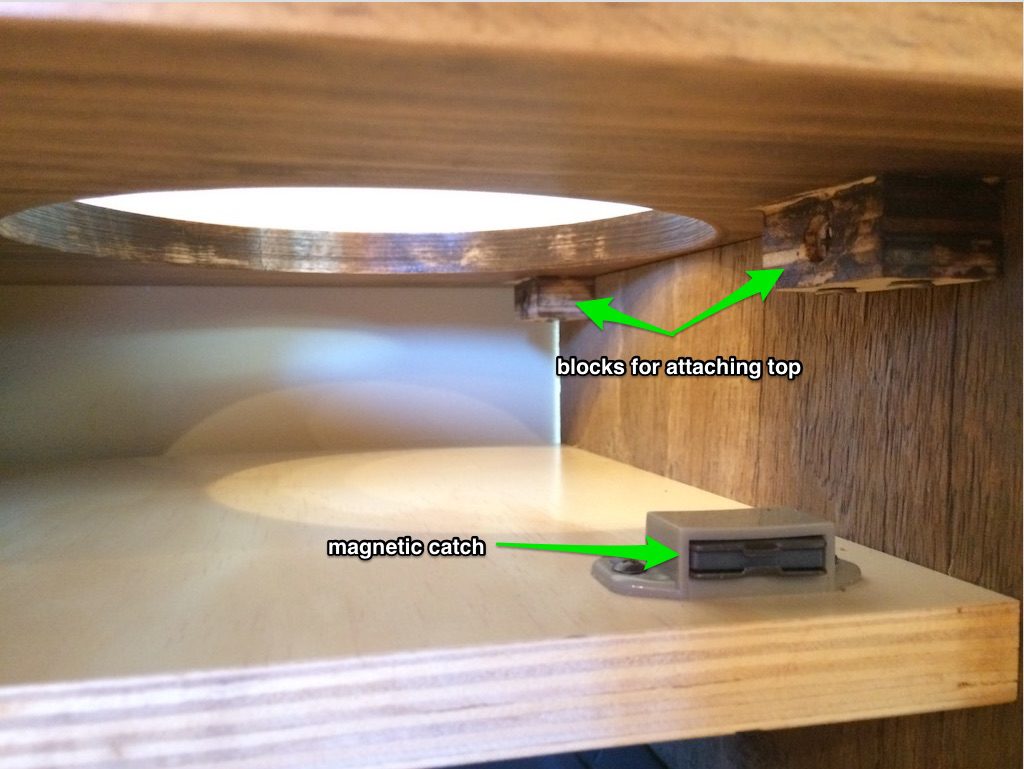
To attached the top I screwed 4 small blocks to the underside of the top in line with the sides. I pre-drilled holes horizontally in the blocks so that I could then screw the top to the sides. It worked great and will make it easy to remove the top if I ever need to replace it or refinish it.
Build your own.
This is a fairly simple project that can be completed with just a few tools and some readily available materials. If you build your own version, I’d love to see it! Be sure to stop by my Facebook page and post a picture of yours.
If you like the elevated dog food station, please consider saving the pin on Pinterest.
Watch me build a second elevated dog food station.
*If you liked this project, be sure to check out my collapsible Christmas tree shelf and my cedar star projects.
