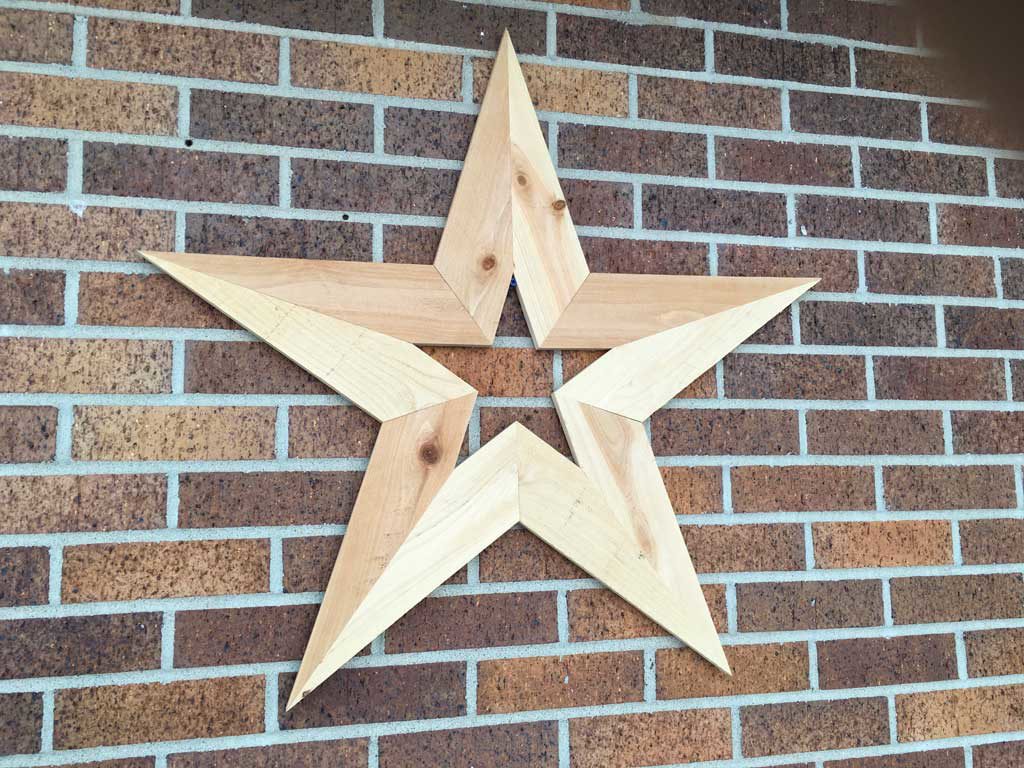
Stars aren’t just for Christmas, but they sure are popular this time of year. After my wife showed me a wooden star decoration she found on Pinterest last year, I decided to try and make one with some scrap cedar lumber I had. I built a jig, did some initial work, then set it aside and forgot about it.
About a month ago I found all the pieces I had cut months before, did some fine tuning on them (my angles were initially off just a bit), and finished the cedar wooden star. In the process, my wife took a picture of it and posted it on Facebook. The next thing I knew, I had multiple orders for these cedar wooden stars through her post and through my Facebook page.
For my local followers, I will gladly make one for you, but for those who aren’t nearby, I decided to make a video and write a post about how you can make one on your own.
In some ways, this is a simple project, but the fact that it includes multiple precise angles, I would actually rank it as being of moderate difficulty. Your first one might not turn out quite right, but don’t let that get you down. Fine tune your process and your jig (assuming you use one like I do) and you can do it!
You can read about the process below, but it might be easier to watch this video. *Be sure to be safe! Using eye and hearing protection, and be sure to read and follow the safety directions provided with your tools.
How to build a DIY wooden star decoration for your wall – video.
TOOLS USED:
- Kreg Mini
- (OR Kreg Junior
- Kreg Face Frame Clamp
- Toggle Clamp/Hold Down Clamp
- Protractor
- 3/4” or 1” pocket screws, coarse
- Titebond II wood glue
1. Cut your pieces to approximate length.
For the DIY wooden star, I use 1”x4” by 5-foot long cedar fence pickets from Menards. My local Home Depot and Lowes only sell 1”x6” pickets. Those will work if you make a bigger star or rip them down to 1”x4”.
For my star, I cut 4 pieces from each fence picket. Since the pickets are 5’ long, I am able to cut each piece to about 14.5”. You need 10 pieces for one star, so at this size, you will need 2.5 pickets. I usually buy 5 pickets and make 2 stars at a time.
Your star will be approximately twice the width when assembled as a single piece is separately. So a 14.5” piece will create a star that is a little over 29” across.
When you cut the first angle later on in the process, you will have enough scrap pieces to build another smaller version of this star. Optionally, if you do a little planning now, you can actually get 2 pieces from each section you cut at this stage. I’ll try to explain this later in step 4.
2. Straighten the edges on the cedar fence posts.
I have found it best to shave just a little bit off each edge of the pieces so they are exactly the same width and have straight edges. Cedar picket will be somewhat inconsistent in width and thickness. But because this project requires precise angles, it is important to make sure each picket is the same width.
Run your pieces through your table saw, trimming off just a saw blade’s width from each side. The easiest way to do this is to find the narrower of the pickets you purchased and set your table saw fence to a width that will take off just the edge of the piece. Taking off just the width of the saw blade should do. Run your additional pieces through at this width as well.
Now, put the straight, freshly cut side against the fence and adjust the width to take another saw blade’s width off the other side. Pass all your pieces through at this width straightening up the other edge.
Your pieces should now have two straight, parallel edges.
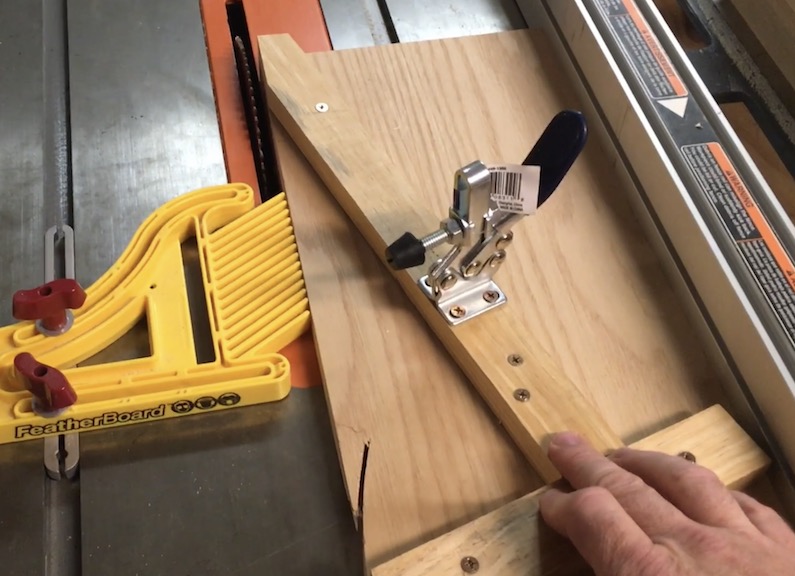
3. Build a wooden star cutting jig.
The best way to make a star is to start by making a 5 point star jig. The jig allows you to make repeated guts more quickly, easily, and consistently.
For the jig, you’ll need a scrap piece of plywood about 20” x 8”, as well as a couple of 1×2’s.
Using your table saw, square up the scrap piece of plywood on both long sides. Using a protractor, mark a line from the top left corner of the plywood diagonally at 18 degrees toward the opposite corner. Be precise! The angle of a wooden star is key. Double and triple check.
Screw a 1×2 precisely along this line (do not glue as you may need to adjust this angle slightly if it’s not quite right). Add a second 1×2 creating a right angle to the first. Your jig should look like this.
4. Cut your pieces on the jig.
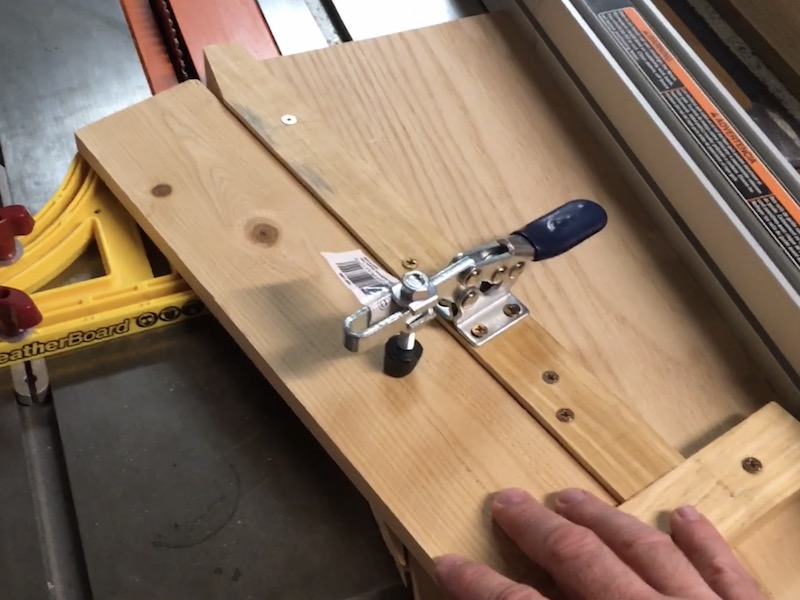
Set your first piece in the jig and adjust your fence so that the blade will cut starting right on the corner of the piece. This will maximize your materials. Save the off-cuts as you can use them to build a smaller version of the star.
As I mentioned above, you can actually get 2 pieces out of each blank at this point. To do so, set your jig so that you will have approximately the same amount of wood on both sides on this first cut. You will essentially be creating mirror image pieces if you do so. If you choose this route, you may want to make your pieces slightly longer in step 1. Here is a video that better explains the process.
5. Drill pocket holes and attach each “petal” of the wooden star together.
Now lay out your pieces, choosing a “good” side and organizing your color variations into pairs. Turn the “good” side down, and in the same side of each pair, drill 2 pocket holes along the freshly cut angle, spacing them along the edge as seems appropriate.

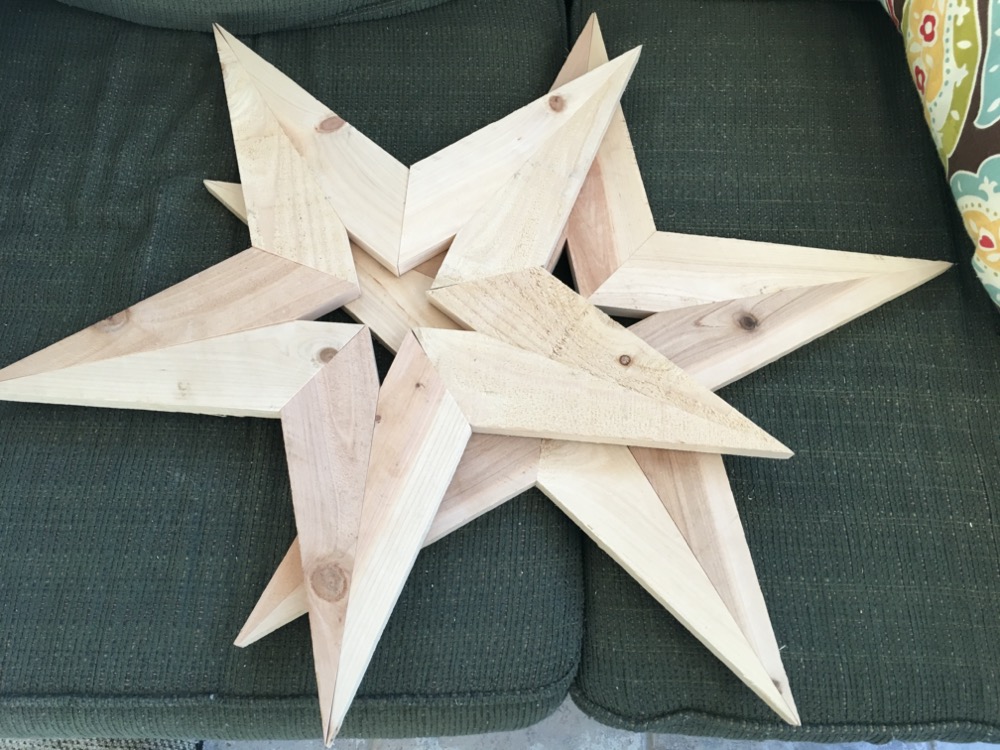
Lay out your pieces again in pairs as before, with the “good” side down. Drive pocket screws into each pair of pieces. Optionally, you can add a little wood glue before you screw them together. You will now have the 5 points of the star…just a couple more steps left.
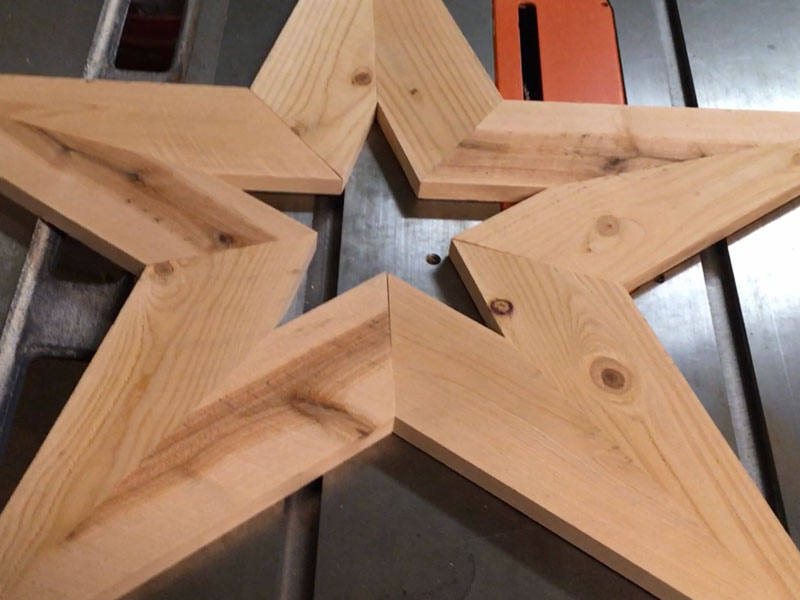
6. Cut the opposite angle on the other end.
Now you need to cut the angles on the other end of each pair. Fortunately, you can use the same jig!
Your pieces may vary in length slightly. For the next step, find your shortest piece by aligning the pointed ends against your fence. Use this piece to set up the next cut.

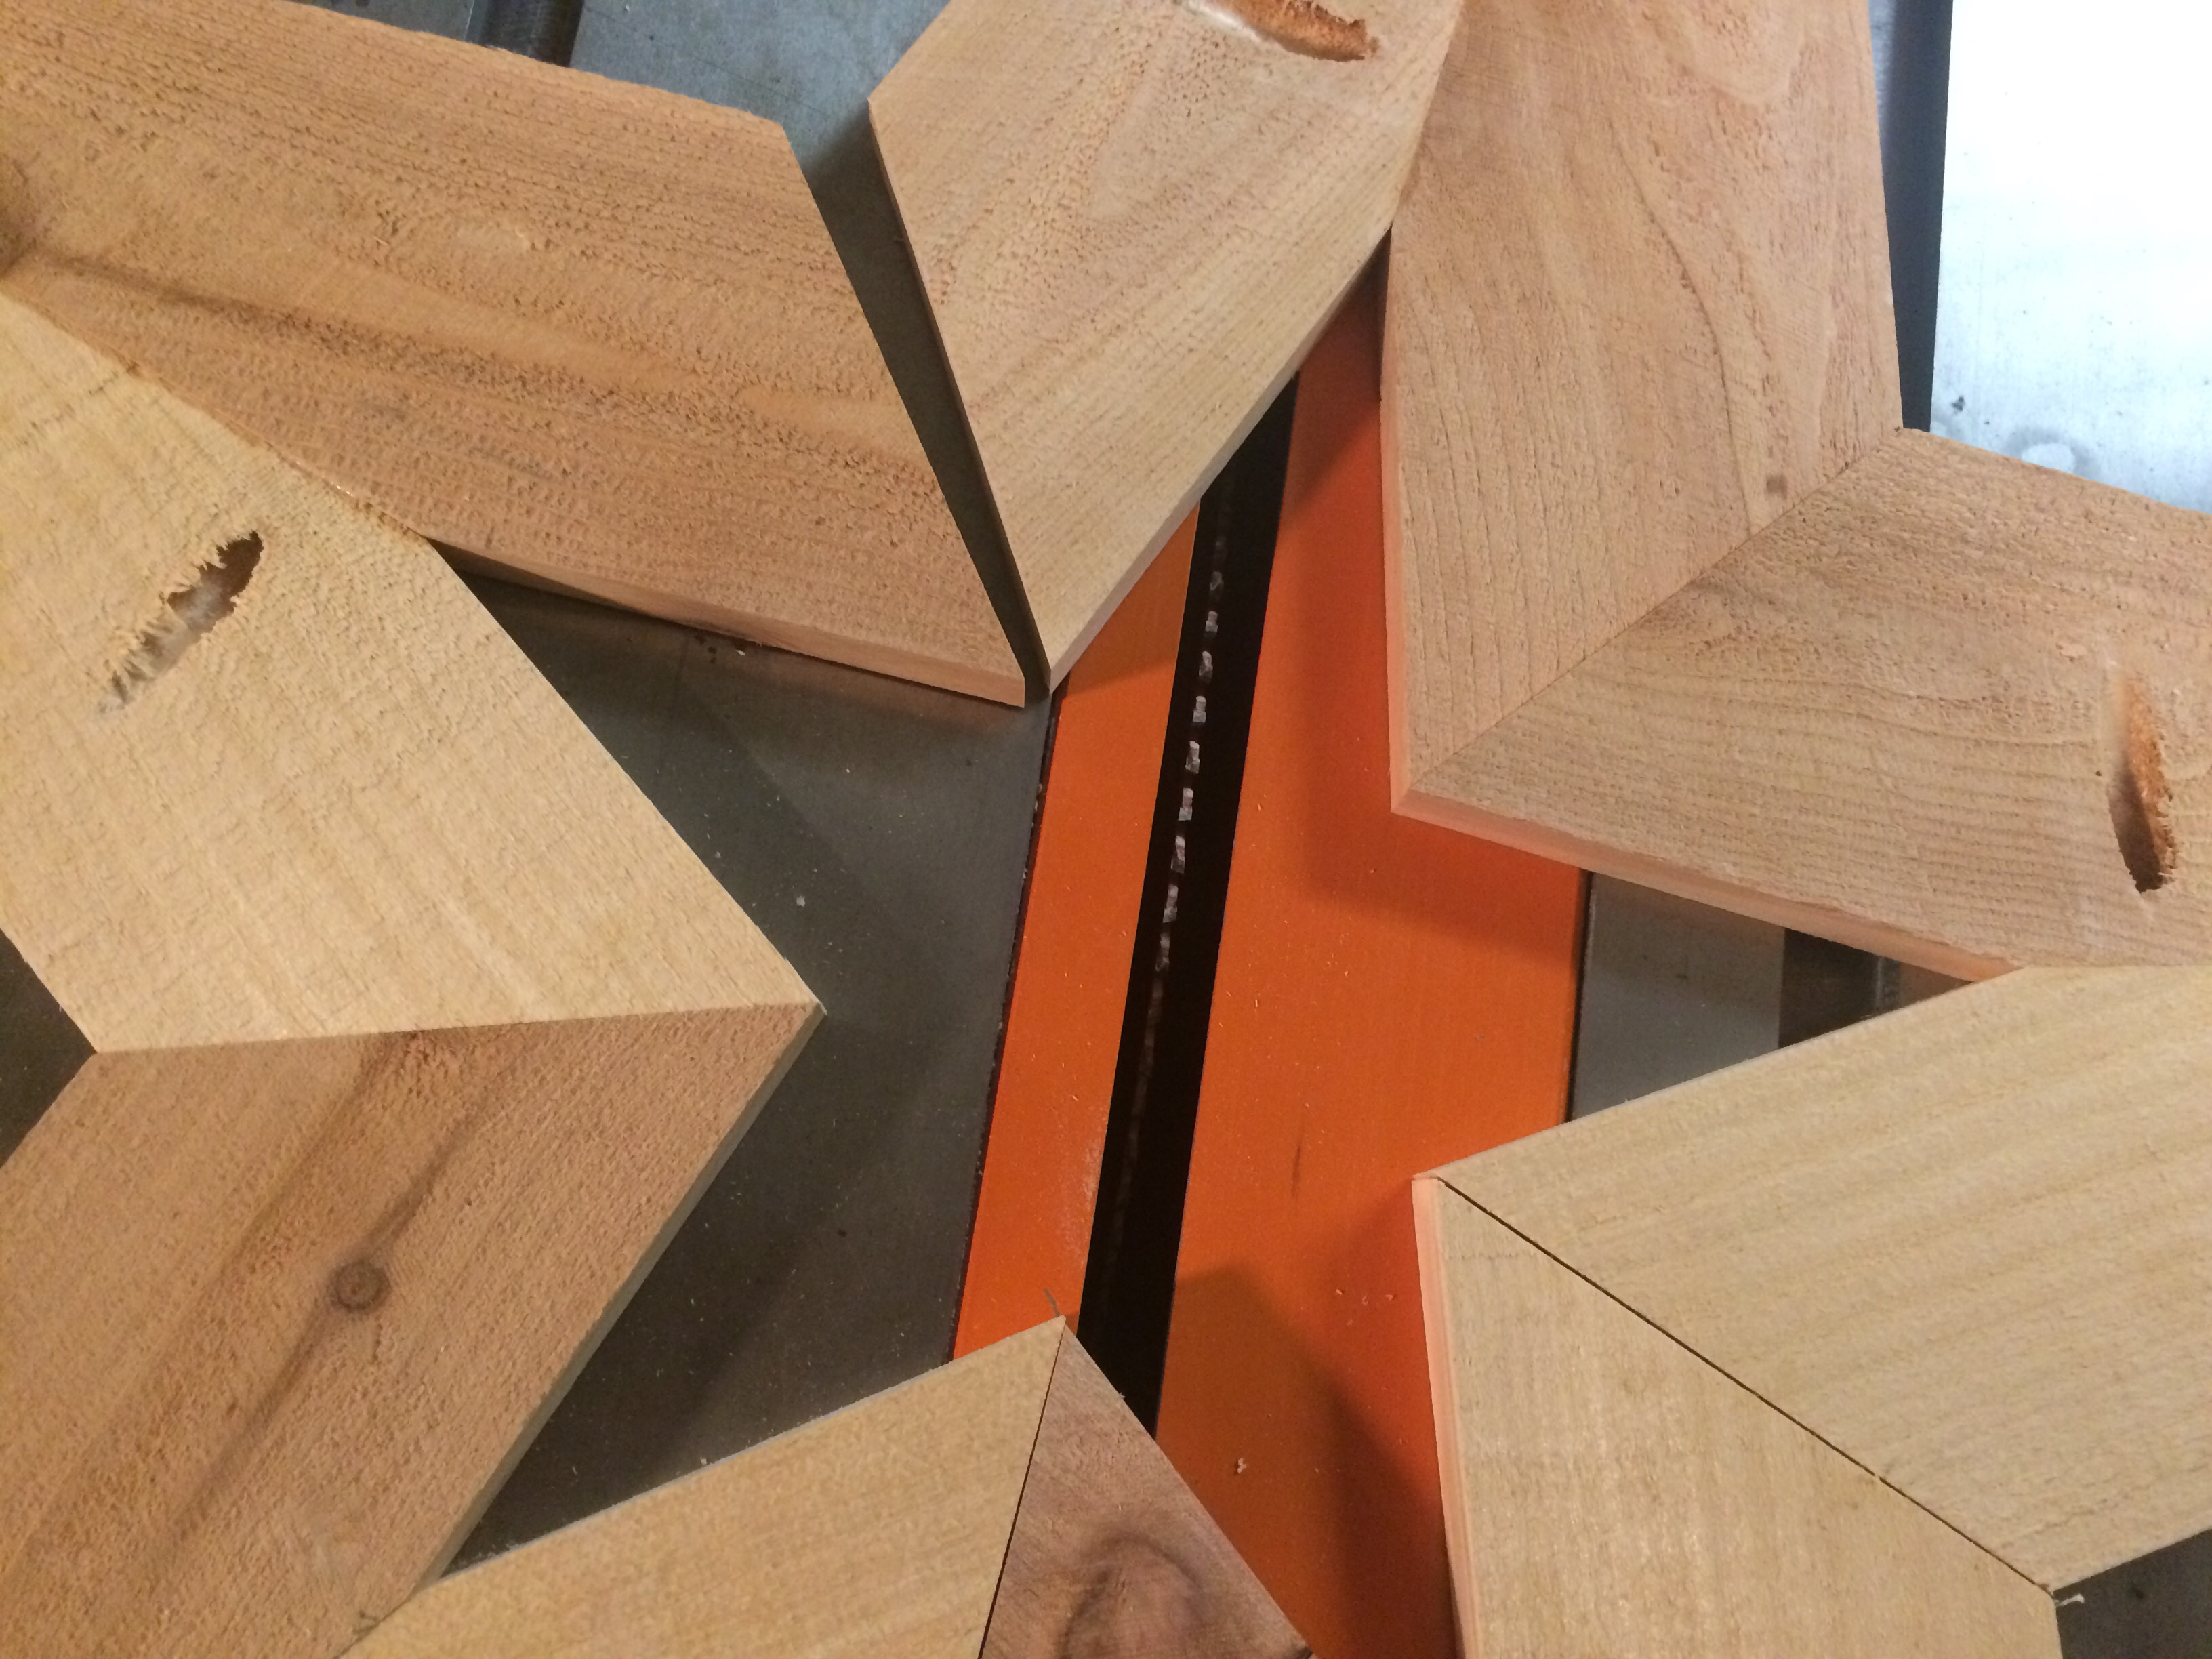
Place the pointed end against the perpendicular piece of the jig, and align the long edge along the 18-degree angle. Adjust your fence so the saw blade cuts all the way across the piece. Very carefully run the piece through the saw using the jig. Flip it over and cut the other side. Repeat this for each piece.
This is where you will find out how close you got your angles. Since there are 10 pieces, each with 2 angles cut using the same jig, any discrepancy is multiplied 20 times. Do not fret if your angles don’t turn out quite right at first. You may have to fine-tune your jig, or do what I do and use the miter gauge on the table saw to make the final adjustments.
Layout your pieces with the “good” side down and test to see if your angles will come together. If you have just a small gap (1/16” or less) you should be able to pull it together with screws in the next step.
If you have a larger gap and the circle isn’t complete, you will need to use your miter gauge on your table saw to fine tune this inside angle. I use a miter extension and a stop block to set up this cut. You need to adjust your cut to a little over 36 degrees on the miter gauge.

If you when you layout your pieces the outside corner touches, but not the inside, you will need to use your miter gauge and adjust your cut to a little under 36 degrees. Trim each piece and test fit again.

It’s at this point that you’ll know how well you built your jig. If you intend to build more stars, you’ll want to make a very slight adjustment to your jig. In my case, I simply rely on fine-tuning the final angle on the table saw.
7. Drill pocket holes and assemble the wooden star.
With the “good” side down, drill pocket holes along the freshly cut angle on the opposite piece that you drilled the previous pocket holes. Be sure to choose this same side for every piece.
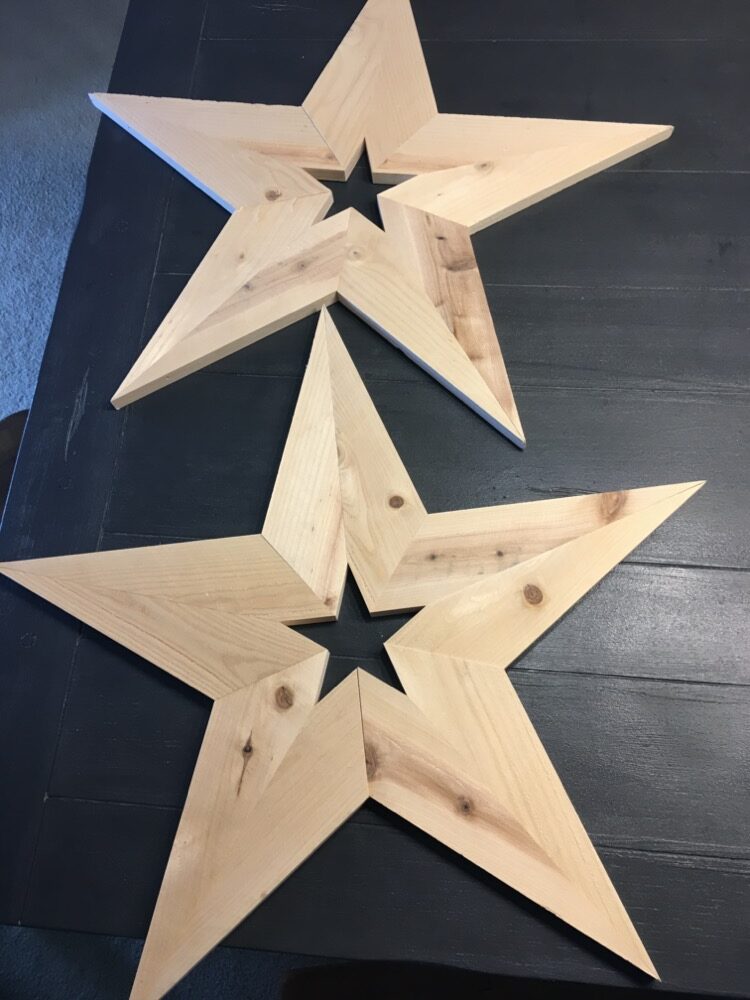
Layout your star a final time and check for fit. No matter how many of these I make, I always end up with a little gap. But since these are decorations, often hung outside in the weather, I can usually manage to adjust these last screws enough to eat up a little gap in each connection. As my grandpa used to say, “It’s good enough for the girls I go with.”
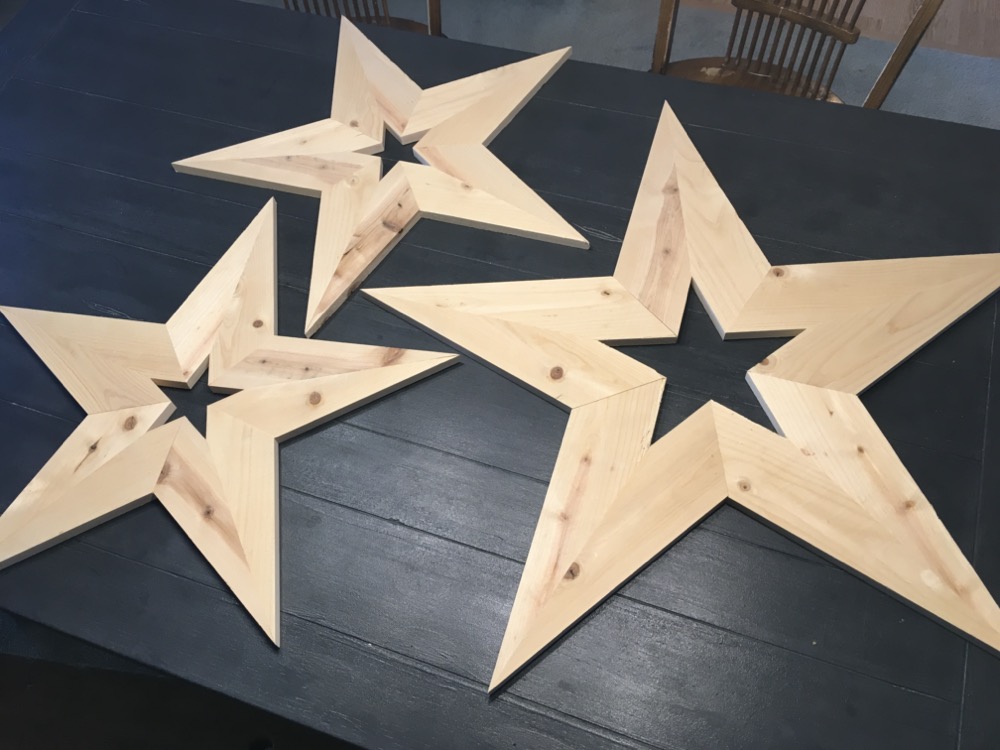
Examples

3 Responses
You can use something like playing cards as shims placed on the appropriate end of your jig to correct the cut of one or more pieces untill you eliminate gaps
Excellent suggestion! That would at least let you figure out how much you need to adjust.
Can you just cut an 18 degree cut with your sliding mitre saw instead of building a jig??