
Every house has one of those spaces that makes you scratch your head…What did they intend this space for when they built the house?
We had one of those spaces in our basement. At the bottom of the stairs, there is an open area outside the entrances to the extra bedroom, the bathroom, the family room, and the hall to the other extra bedroom that is nothing more than a wide spot in the hallway. It’s around 3 foot by 4 foot right outside the bathroom door.
It’s not a big enough area for a seating area, but it feels like you need something there.
How about a corner bookshelf?
Great idea! We have a bunch of books in boxes from our last move and need a place for them. And a corner bookshelf will give the area purpose and visual interest without overpowering the space.
By the way, is it a book shelf or bookshelf, book case or bookcase? I’ll stick with built-in corner bookshelves for now, but maybe corner bookcases would work as well.
Watch the corner bookshelf build.
If you like to read, you can skip below and read more about how I built the corner book case. But if you are so inclined, you can simply watch the video. In fact, subscribe to my YouTube channel while you are at it.
Open corner? Or boxed-in corner?
Most corner bookshelves (or book case) that you see will have a boxed-in corner. It makes the construction much simpler and allows you have have adjustable shelves as well.
But I chose to have an open corner. I took the more difficult path.

An open corner means that I would have to come up with a way to support the shelf in the middle. This really wasn’t that big of a problem as I simply added a vertical 1×2” in the back corner of each shelf. But it did mean that I would have to build the shelf in place, one shelf at a time, and the shelves would have to be fixed in place and couldn’t be adjustable.
If you are looking for a simpler way of building a corner bookshelf, simply box in the corner. With this approach, you can essentially build two separate shelves, butt them against each other in the corner and install them in place.
With the open corner, I simply painted the wall behind the shelf to match rather than attaching any kind of a back.
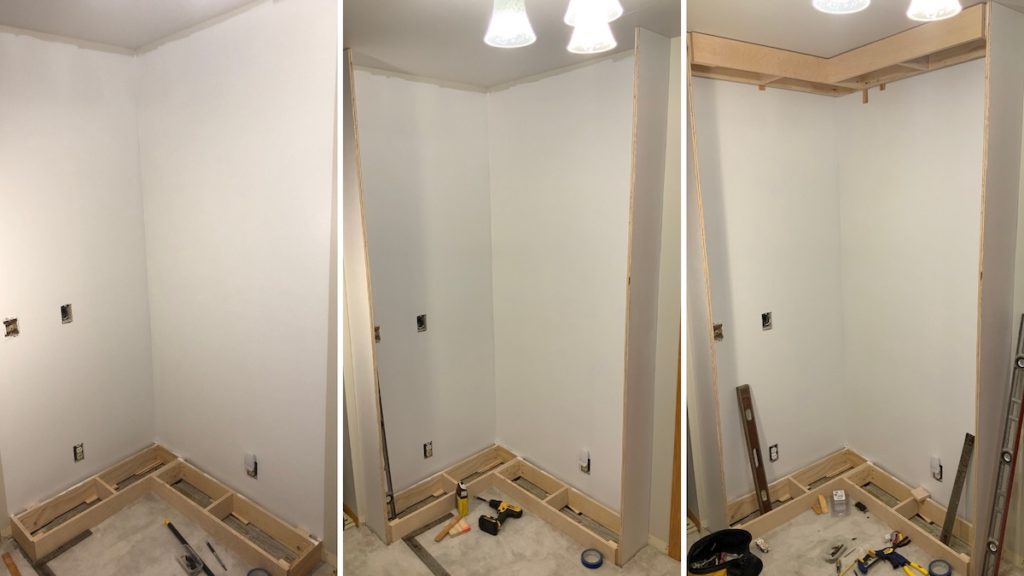
Installing the main structure.
The first step is to build the top and bottom boxes and cut the side pieces. These form the main structure of the corner bookshelf.
Once you have the boxes built, install the bottom box in place like you would a base cabinet. Make sure it sits level on the ground using shims. Make sure it is as square as possible in the corner. And attach it in place with a few screws into the studs.
With the bottom box in place, install the side pieces making them as close to plumb as possible. You’ll be able to cover small gaps with trim later in the build. Attach the sides to the bottom box with screws from the inside making sure they do not penetrate all the way through.
With the bottom and sides in place, use some clamps to position the top box in place, making it level, and attach it to the side pieces with screws and to the wall studs with screws and shims. Double check everything to make sure it is square and plumb (or pretty darn close).
Fitting and positioning the shelves.
With the main structure in place, you can then move on to fitting each shelf one layer at a time. While each successive layer is nearly identical, I custom fit each shelf level as I went and marked them clearly. This allows you to accommodate for any slight difference in width from bottom to top.
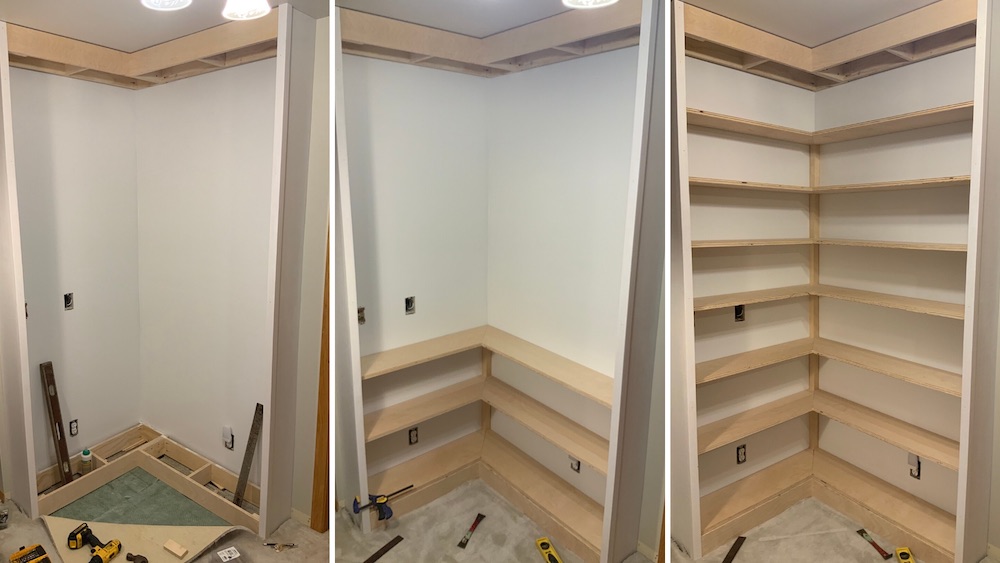
I used vertical spacers on each end of the shelves, and one in the middle. Because the shelves were mitered and biscuited, the corner of each side section rested on the center vertical support. Once you trim the front edge of the plywood shelf with a thicker solid edge piece, the shelf is remarkably stable. I do worry a little about the shelves sagging over time, but I know that in the worst case scenario I can easily add more support to what I already have to address the problem.
Painting the corner bookshelf.
As much as possible, I like to paint the individual components prior to installing them. I find it much easier to paint pieces I can lay flat on a table than waiting and painting everything after it is built and installed in place. Sure, you still have to do some touch ups after installation, but you can get the hard part out of the way first.

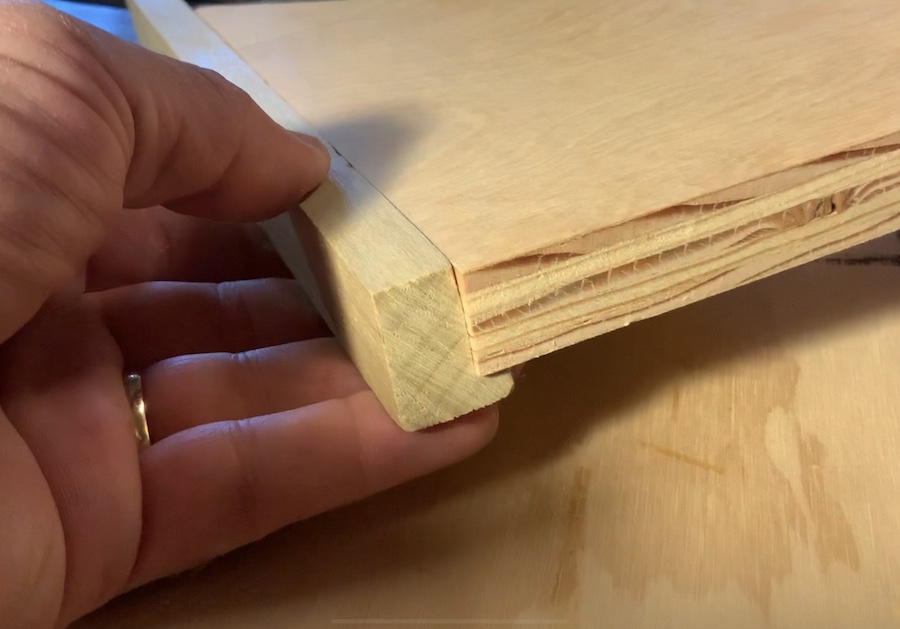
Shelf edging (or shelf cap).
To cover the exposed plywood edge of the shelf and to give it more rigidity, the front edge of each shelf is capped with a poplar trim piece. The trim cap is 1″ x 3/4″ and rabbeted leaving a 1/4″ ledge for the bottom of the shelf to rest on. The edge cap is then glued and pin nailed into place. I applied the edge cap after the shelves were installed in place.
The finished product.
The corner bookshelf turned out great! My wife couldn’t wait to put books on it and start using it. I added a few trim pieces to the sides and a simple cove molding to the top (to hide the gap) and the shelf was ready for prime time.

3 Responses
Hey Jason,
Is there a sketchup file and materials list you can share for this?
Tommy – I do technically have a sketchup file, but it is unique for the corner I put it in. Maybe I can at least put together a measured drawing and get that on the site….
I have almost the exact same space to build in, so it would go a long way for me. Just from the measurements I can see the in picture above literally I wouldn’t have to change a thing.