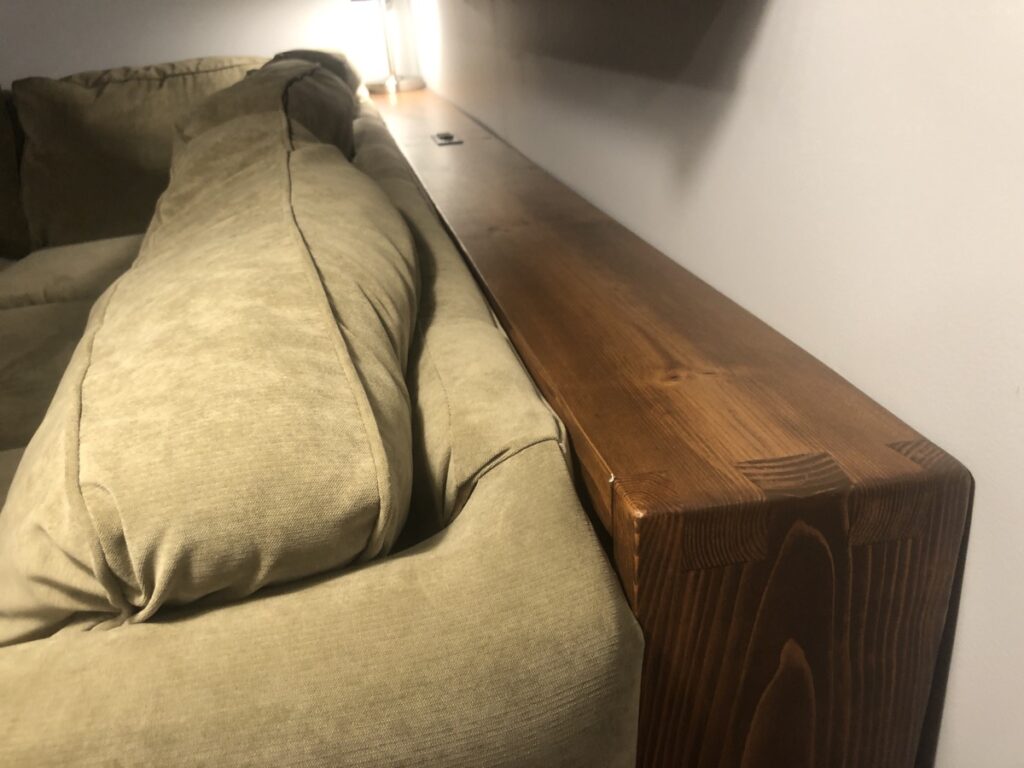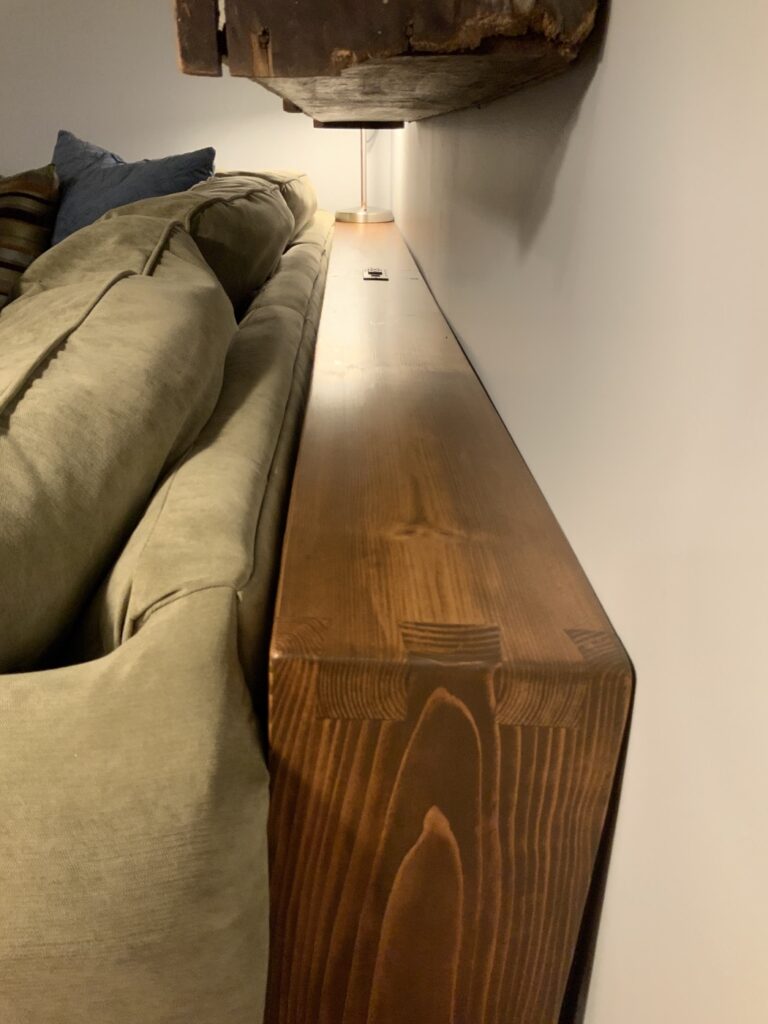
Nearly everyone has a family room with a large television where they gather and watch movies. We have one in the family room in our basement. It’s a great place for our family to hang out, but it needed something. Where can I set my drink? Oh shoot, I need to charge my phone! We needed a skinny sofa table!
A coffee table won’t cut it, it’ll take up too much space. A regular sofa table won’t work either. We’d never find one the length we want and that didn’t also take up too much space.
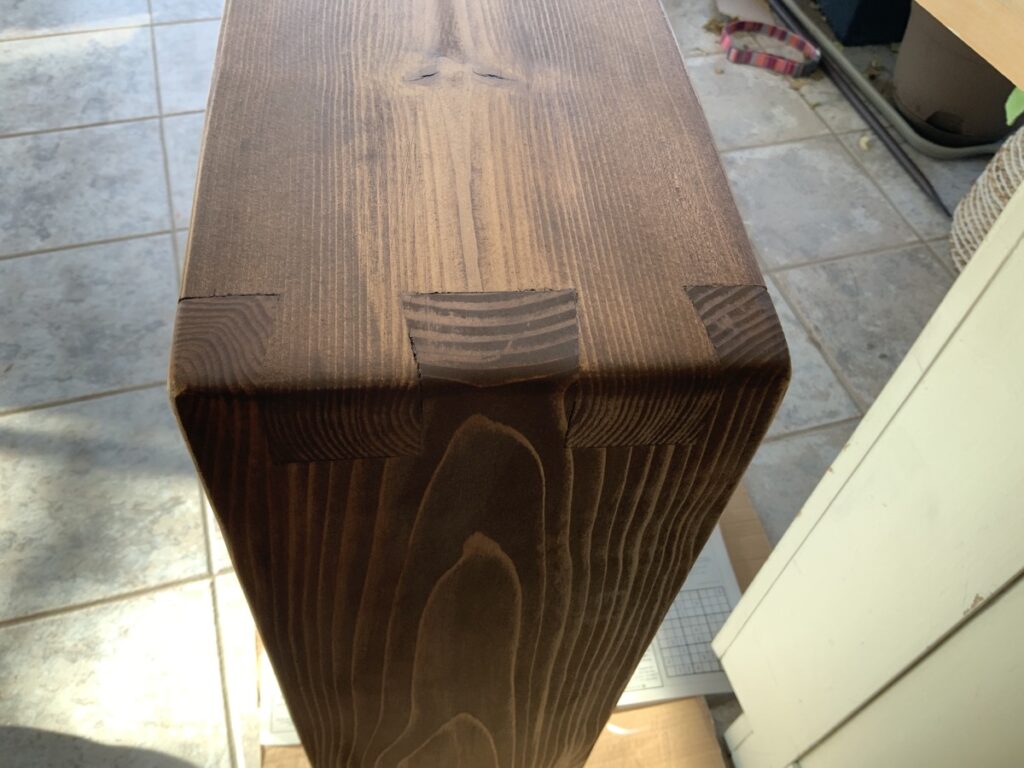
We needed a skinny sofa table, and it became clear that this would be a DIY woodworking project! But not just any skinny sofa table, we needed one with an outlet for charging phones and devices, and it needed to be simple, but interesting…so let’s dovetail it!
- Recessed power strip with usb ports, come with 10 FT power cord, Easy to install, no electrician needed and made a nice …
- Desk outlet with USB output: 5V/2.1A, design for DIY furniture power outlet needs, desktop outlet for island cabinets, s…

You can watch the video on my Handcrafted by Jason Cooper YouTube channel (please subscribe), or it’s embedded below. For written information about building a DIY skinny sofa table with outlet and dovetail ends, please read below the video.
How to build a skinny sofa table with outlet and dovetail ends
Prepare the lumber for your skinny sofa table
For my table, I simply used 2×8 construction lumber. My table was about 9 feet long and 32 inches tall. The nice thing about building your own is that you can match the size to your sofa
I purchased one 10 foot long 2×8, and one 6 foot long 2×8 in order to make the top and the legs.
I started by cutting the boards to the lengths I needed. Since I was going to dovetail the ends, both the top board and the legs needed to be cut the full length and height of the table.
Once cut to length, I ran them through the planer to eliminate any cupping.
Layout your dovetails
I won’t go into all the details of making dovetails, but I cut tails on the top board and pins on the legs. Most recommend making the tails big and the pins small, but I actually made mine fairly even. It’s really up to you to choose. Do a little research, and sketch it out first.
Cut your tails first
Cutting dovetails takes a steady hand, patience, and even more patience.
I highly recommend practicing your dovetails on some scrap pieces of the material you will be using. One practice piece can make a huge difference in your results.
I used an inexpensive pull saw for all of the straight cuts. I used a coping saw for removing the waste material. High quality tools will improve your results, but you can still get good results with inexpensive tools. It may be worth trying before you invest hundreds of dollars on special tools.
Clean up all your cuts with a very sharp chisel. Be sure all of your cuts are 90 degrees to the surface and straight.
Use your tails to layout your pins
Now that you have cut your tails, use them to layout your pins. Be sure to keep track of which leg goes with which end of the table as your dovetails won’t be perfectly identical.
Always stay to the waste side of your marks. You can sneak up on your lines using your chisel and test frequently to see if you need to remove more material.
Dry-fit your dovetails
The joint should be snug. Not too tight, but not too loose. You might have to coax the joint together with a wooden mallet, but be careful. If it’s too tight, you can split the wood or break a pin.
Glue your dovetail joints
Once you have cut your dovetails and are satisfied with the dry-fit, glue the joint. Apply glue fairly generously to all mating surface. Drive the joint together with a wooden mallet and clamp both sides of the joint to a carpenter’s square to keep them at 90 degrees until the glue dries.
Sand and finish your skinny sofa table

After the glue has dried, remove the clamps and using a scraper or chisel clean up any glue that oozed out.
Now sand the dickens out of the wood until you are satisfied with the result. I usually start with 100 grit and work up to 180 or 220.

There are lots of good finishes out there. Minwax and Valspar are readily available at most home improvement centers and are relatively easy to apply. I typically use stain and a satin polyurethane sealer. Someday I need to write more about finishes, but not today.
Good luck building! And be sure to check out some of my other projects like the cedar wooden star or the cascade stand.


2 Responses
Great idea and space saver.
Thanks!