I’ve had an intermittent problem with my outboard motor’s trim system since I acquired the boat. Every once in a while it would not trim down. Usually I could rock the trim switch up then down quickly and it would work. But this season, it has been working less often than not.
In researching the issue, I thought I knew what the solution would be. If it won’t go down, then it MUST be the down relay. I even swapped the relays and the problem followed the relay…it wouldn’t go up when swapped. When it wasn’t working, you could still hear the relay click as if it was working.
So I ordered a replacement relay.
Replacing the trim relay
When the replacement arrived, I swapped out the down relay in a matter of minutes and tested it. At first, it seemed to be working! I was excited that my problem was fixed. But after a few more tests of the trim system (running it up and down), it failed again and wouldn’t go down. Surely this new relay wasn’t bad already?
What did I miss?
After doing a little more research and watching a few more videos trying to understand, it dawned on me.
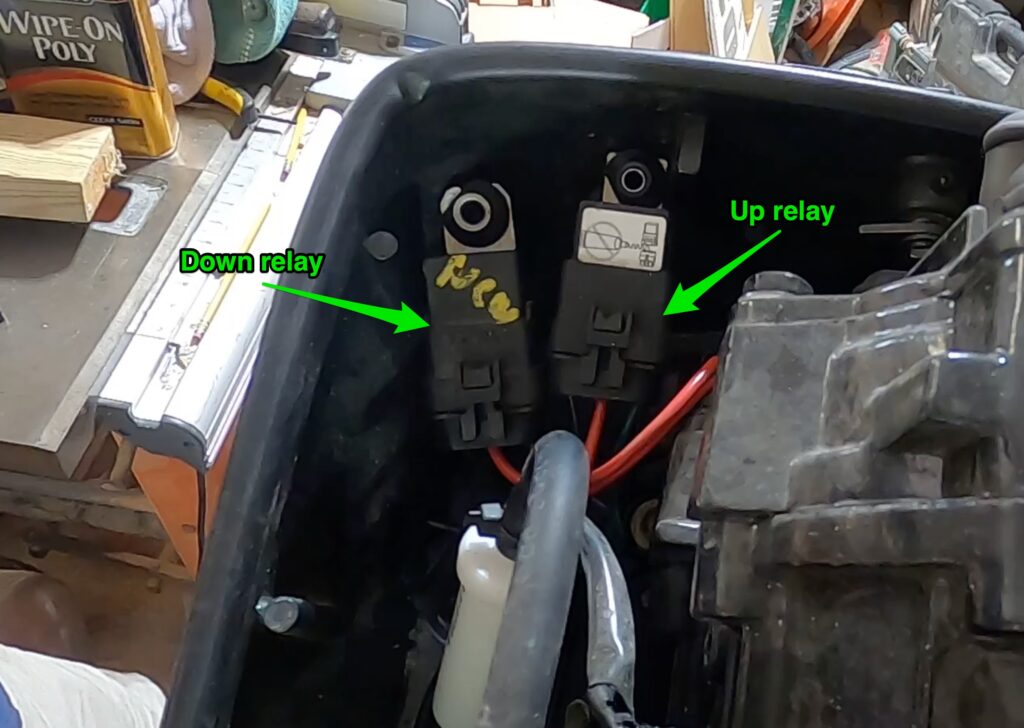
Understanding the trim relay system
A two-wire, two-relay trim system uses reversing polarity to make the trim motor go up or down. This means that BOTH relays are in use regardless of which direction you trim the motor. The energized relay provides the positive current, while the non-energized relay provides the ground path back to the battery.
If the relay is failing in the energized state and won’t go down, then it is likely the down relay. But if the relay is failing in its non-energized state and won’t go down, then it is likely the opposite (up) relay. But how do you tell? Swapping the relays will always reverse the problem regardless of which relay is failing because they are both in use in either direction.
Which relay should I replace?
Typically, relays fail in the energized state. So it’s best to replace the up relay if it won’t trim up and the down relay if it won’t trim down. However, as in my case, if you replace what you believe is the problem relay and the issue persists, replace the opposite relay.
The easy solution for replacing trim relays
The only foolproof way to fix the problem on the first try is to replace both relays simultaneously. If one fails, replacing both will solve your trim issue. In my case, had I done this, I wouldn’t have known which relay was bad, but I would have fixed my problem.
If you encounter a situation like mine where you replace what you believe is the bad relay and the problem persists, don’t get confused. You simply replaced the wrong relay.
