
I was asked by a friend to make a reclaimed oak bench to match a dining table they bought when stationed in Europe. The table was made of reclaimed oak and had a rustic, hand planed (or hand scraped) texture running across the grain. The bench ended up being 70 inches long, 13.25 inches wide, and 18 inches tall.
Watch the video
The video does not show the early stages of cleaning up the wood, gluing up the top and blanks for the legs, shaping the legs, or texturing the top. I did not think to film this until I had already done so and created the rustic, hand planed texture on the top. Details of the project can be found below the video.
How the reclaimed oak bench began
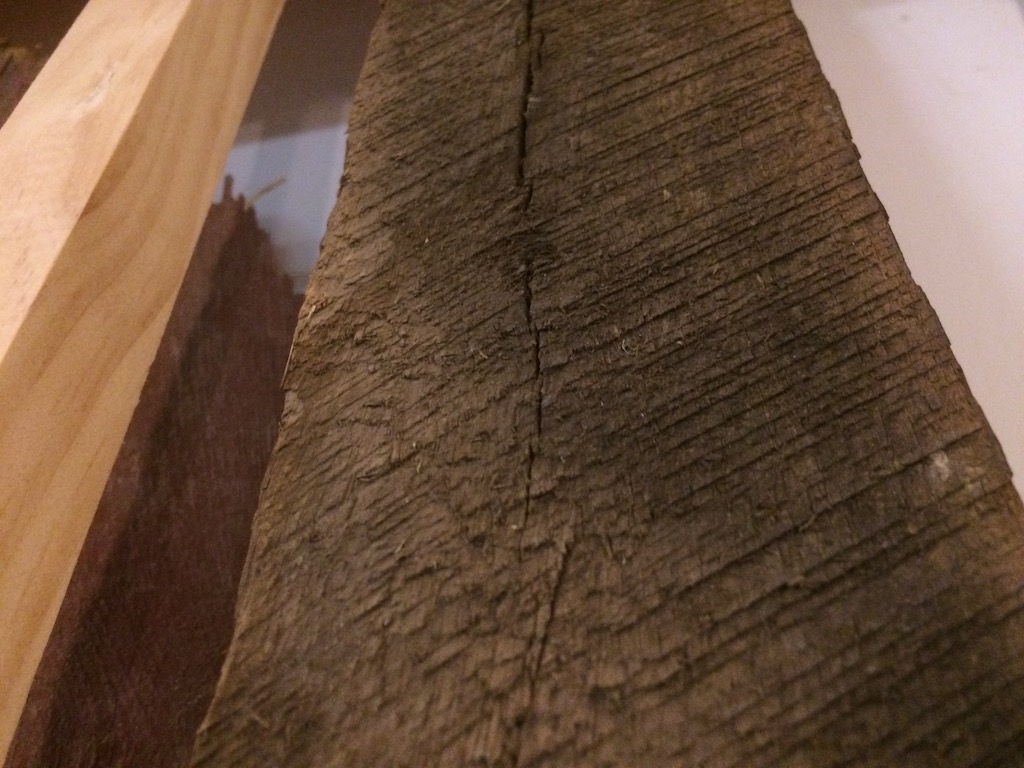
I source the reclaimed oak from an Iowa farm that had salvaged, rough cut oak 2×4’s that were originally from some sort of shipping frame and had been lying around for a couple decades. They were in extremely rough condition as you can see in the picture.
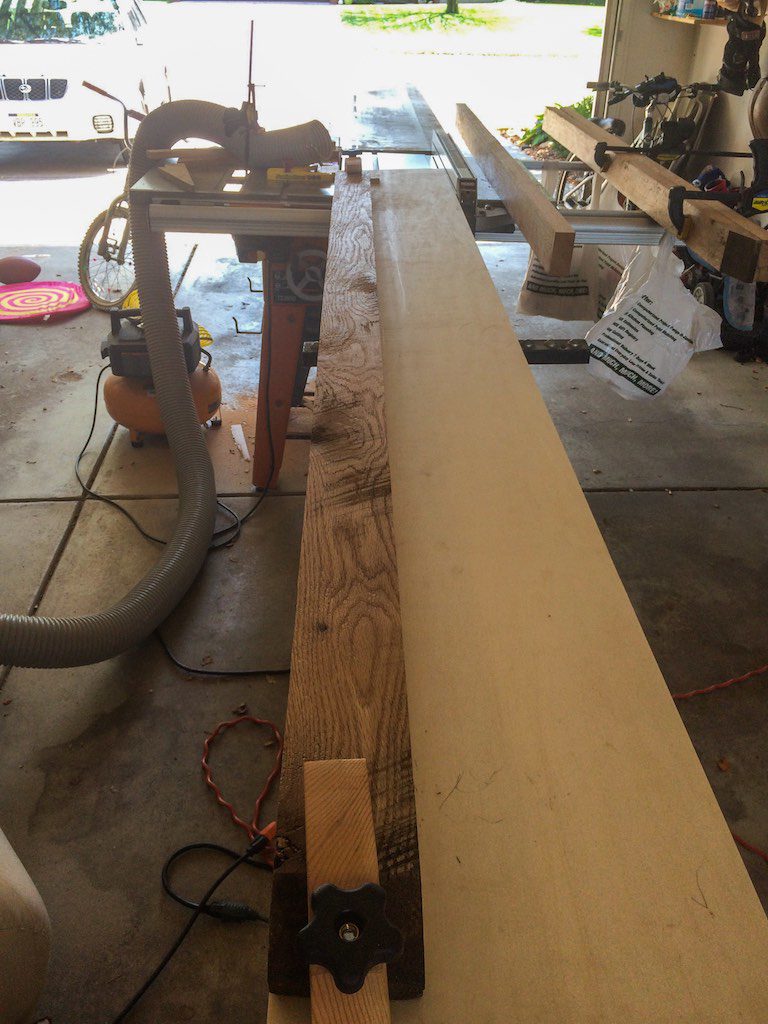
The first step was to clean them up and get them straight and square. I built a straightening jig and used hand planes, but did eventually use a planer to get them to a consistent thickness of 1.5 inches.
The straightening jig was a must! The rough wood had a relatively straight edge, but they were long enough that if they had any curve to them, it was impossible to remove it simply using the rip fence. Once one edge was straightened using the jig, I could put that edge against the rip fence and straighten up the other edge.
Surfacing the stock
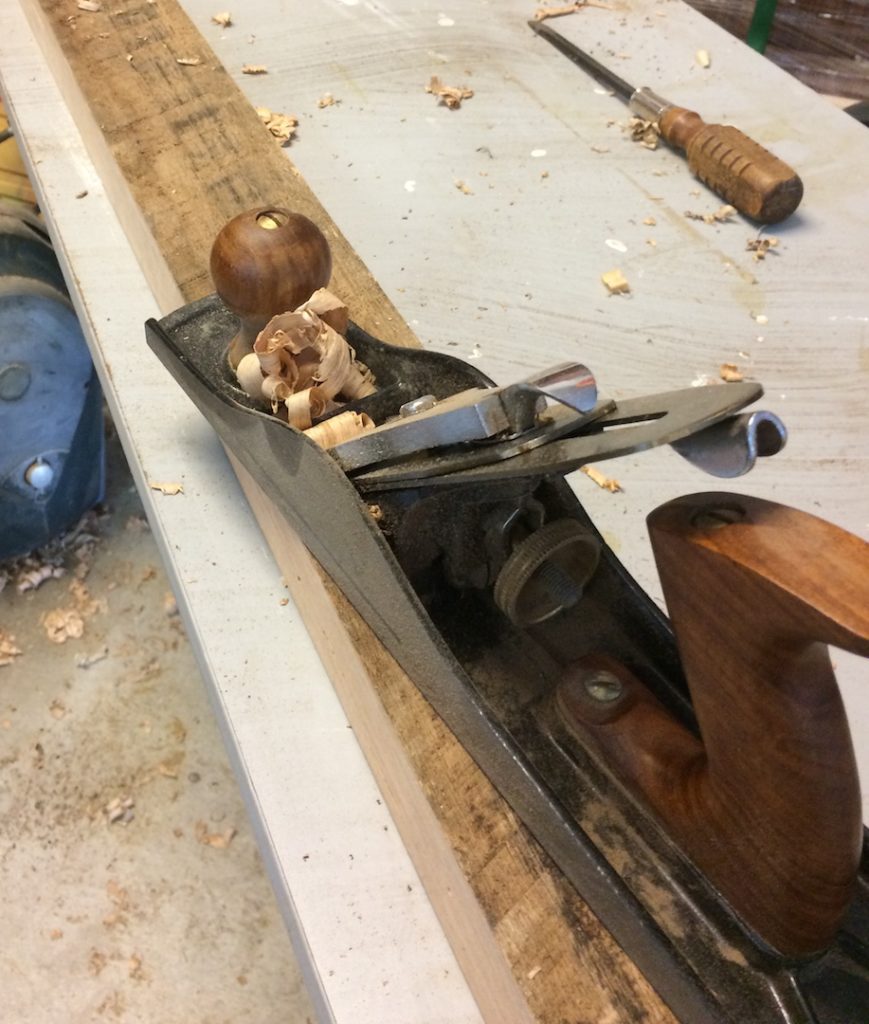
I began by using hand planes to smooth the stock, but I did eventually switch to my planer. I found that the stock was just too uneven, especially since I would need to face glue the pieces for the leg blanks. I did minimal planing on the “good” side of the board and removed excess stock by planing the “back” side. This allowed me to retain some of the rough saw marks on the surface.
Gluing the leg blanks
For the leg blanks, I face glued two pieces about 18 inches long. The stock was 1.5 inches thick and a little over 3 inches wide. This allowed me to plane the edges down a bit, removing any evidence of gluing, and resulted in leg blanks that were exactly 3 inches square. I should mention that I made a prototype leg out of pine so that I could figure out how to accomplish each step along the way without mangling one of the oak blanks.
Gluing the top
Gluing the top was a bit challenging as the individual pieces were 1.5 inches thick and 3 to 4 inches wide. I really had to fine tune the edges so they would come together tightly since even sturdy clamps will have a hard time bringing together such thick stock. After tweaking the edges and being satisfied with the tightness of the joining edges, I marked for biscuits about every 12 inches on the 70 inch long top and glued the pieces together.
I ended up with about a foot long crack on the underside of the top that I reinforced with mending plates to ensure it would worsen over time. If the crack had been on the surface, I would have considered using a dovetail key like I have on other projects.
Shaping the legs.
Using photographs from the original table, I managed to reproduce the leg details.
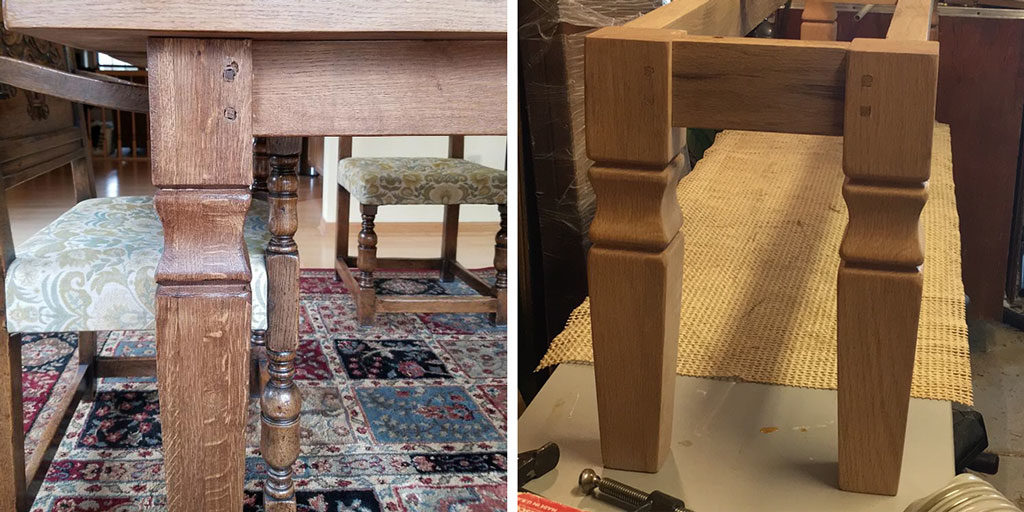
On the left is the original table leg that I was duplicating in the bench leg shown on the right.
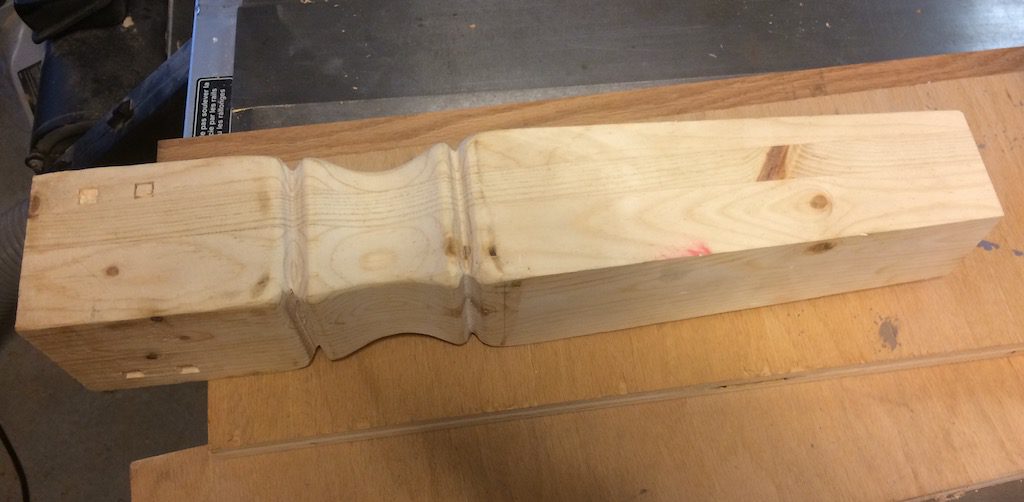
I used my table saw to cut the convex area. By cutting about a sixteenth of an inch at a time, and running the piece at an angle across the blade, you can create your own cove cuts. These coves were certainly challenging since I had never used my table saw in that way before, but it was a little easier than I anticipated.
Cutting a single cove took 8-10 passes over the saw. Because there were 4 legs and each leg has 4 sides, the process of shaping the legs was very repetitive. Each step had to be repeated 16 times. That means that just creating the coves required up to 160 passes through the table saw.
The notches above and below the cove cut were roughed out using the bandsaw and cleaned up first with a chisel, and then with a file before sanding.
I cut the taper on the leg simply using my taper cutting jig.
Building the apron
I used the same 1.5 inch oak stock to build the apron as well. The sides and ends are mortised into the legs, glued, and pinned with square pegs also made from the same reclaimed oak stock.
If you do a lot of mortising, by all means, invest in a dedicated mortising machine.
Creating the hand-scraped (hand-planed) texture
To get the desired texture to match the existing table, I took an old block plane that I picked up at a garage sale and ground a 3-4 inch radius on the blade. Then I spent quite a bit of time sharpening that curve enough that I could shave the hair off my arm with it.
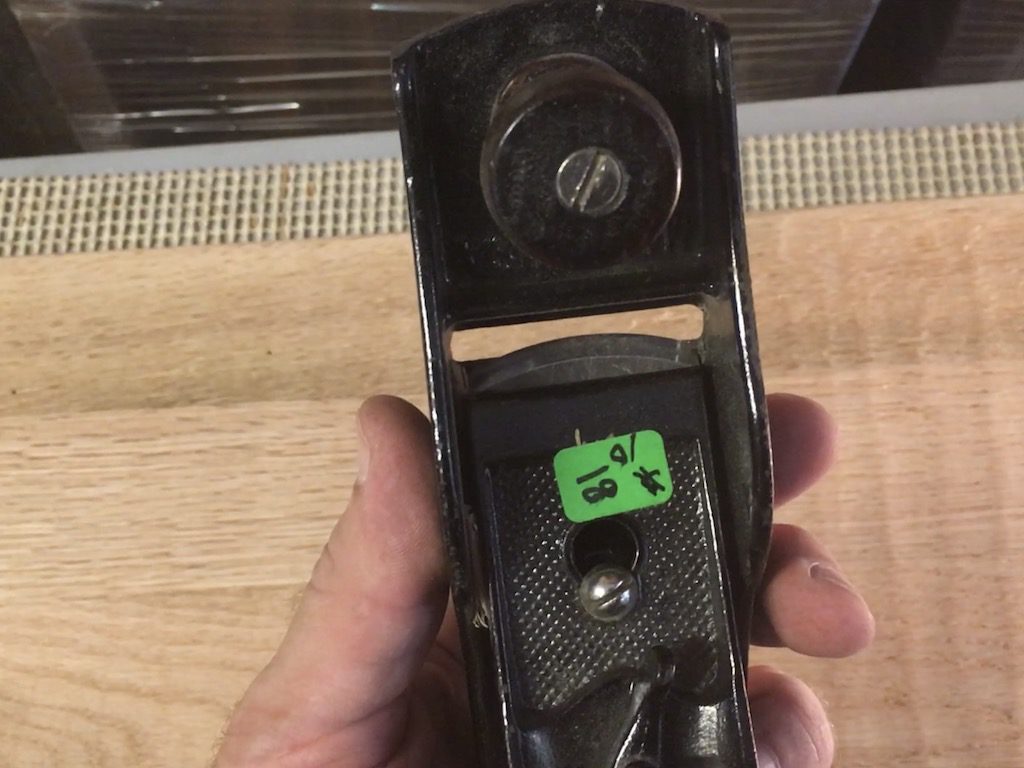
I then planed the oak across the grain (to match the table) being sure to vary the angle slightly each time so the pattern was more random. I had to stop and sharpen the blade 3 times, but it worked pretty well.
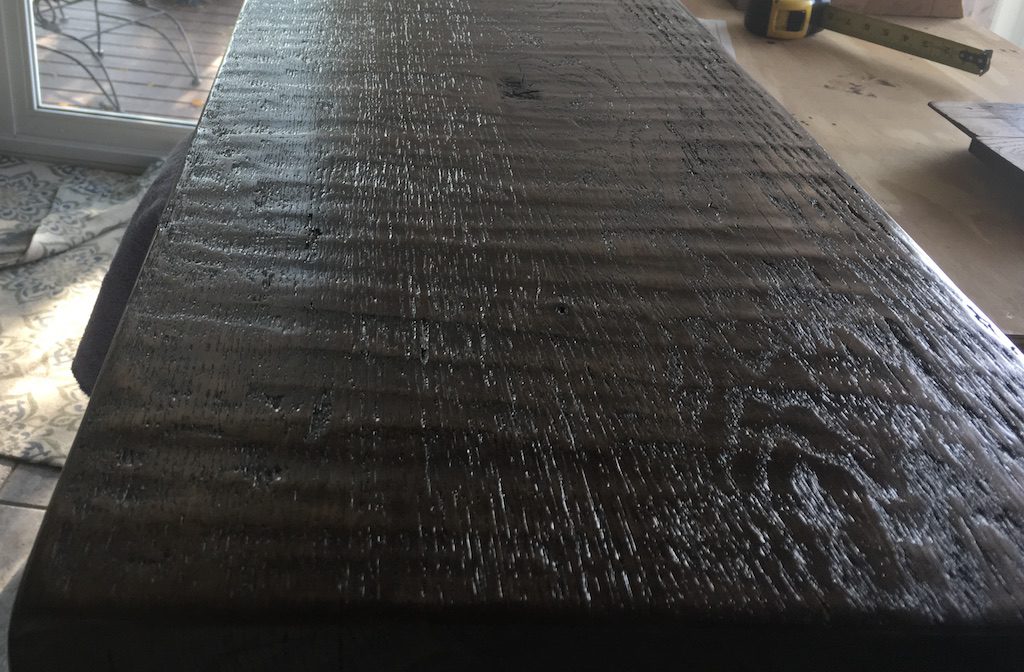
The finished surface of the bench is just begging to be touched.
Since this was old, reclaimed oak, the resulting texture using the curved plane, exposed insect trails, and chip out from planing across the grain is quite satisfying and begs to be touched.
Finishing the reclaimed oak bench
Matching the finish was a real challenge as the table obviously had some sort of tinted varnish instead of a typical stain/varnish finish.
After trying 6 or 7 different stain and tinted poly colors, I ended up carefully staining the oak first and then used a tinted polyurethane to better match the table and even out the color a bit as the porous grain (early wood) of oak soaks up more stain than the dense grain (late wood). I then added an additional coat of clear polyurethane to the whole bench and one more coat of clear poly to the top.
What I learned
New techniques.
Overall this project taught me a lot. Using a straightening jig, cutting coves with a table saw, and creating the hand scraped texture were all new techniques for me…techniques that I will undoubtedly use again.
The importance of test pieces.
For this project, I built an additional leg out of pine in order to “practice” each step in the process on it. When it came to finishing, using scraps of the same wood and testing on the underside of the bench were critical in getting the results I wanted.
I also decided that I really need to build a good crosscut sled for my table saw.
Tools and techniques
- table saw
- circular saw – for trimming ends of the top piece
- palm sander
- mortising attachment – for drill press
- taper jig – for cutting tapers on the legs
- chisels – for cleaning up leg details, mortises, and pin holes
- dado blade – for creating tenons
- pocket hole jig – for attaching top to apron
- clamps – for an extra set of hands and gluing
- band saw – for cutting leg details
- straightening jig – for straightening edge of rough stock
- biscuit joiner – for joining top pieces
Keep on creating!
